Showing posts with label fashion. Show all posts

Sunday, July 21, 2013

Camden Market Fashion!

Once again, sorry for the long post gap. I've got a new computer, since returning from England, so I had to set things up, transfer pictures, and so forth. Camden market is a neighborhood in Soho, London, which is basically full of random market stalls, selling clothing, souvenirs, and just about everything else ever. I was only able to explore a small bit of the region, but what I did see was and alt fashion extravaganza!!


í


While I was there, I bought this dress! Isn't it pretty?


Ok, I cheated. This one's from Glastonbury, but I thought I'd put it in while we were talking about fashion.

Sunday, May 5, 2013

Online Thrift Store Directory!

With anti-consumerism being such a big part of the steampunk/DIY lifestyle, buying clothing used can be a suitable alternative to those--such as myself--less trained in sewing can be a good substitute for making all clothing by oneself. And that's where thrift stores come in!

If you're not sure where to start, I came across this little gem of a website just today. A directory of thrift stores in the US, easily searchable by location. Also useful for newbies is this basic guide to thrift shopping. The Earth and your wallet will thank you. :)

Waaahooooo! Shopping spree time!

Friday, April 26, 2013

My Prom Dress


As any good Neo-Victorian would, I prepared for prom as though it were a grand ball at the queen's palace. It turned out being much rowdier than that (crowd-surfing commenced within the first five minutes), but a good time was had all round.

My dress came from Milanoo's extensive Lolita collection. My review: Though the price for the dress itself was quite reasonable, I had to pay an extra twenty dollars in shipping to get it on time. The quality was mediocre--some of the ribbons were completely frayed after just one night of wear--but that's easy enough to replace. If I may brag a little, it looked fantastic; very Victorian. Some even recognized the style as being Steampunk/Lolita. And since it doesn't have sparkles all over it, it can be re-worn to non-prom events. In conclusion, I would recommend it, although I advise ordering a size up--I ordered a bit larger than my usual size and still found it too be rather tight around the shoulders.
 
OK, picture spamming time:


Sunday, April 14, 2013

Beautiful Steampunk Wedding!

I may not be the kind of girl who sits around at age eighteen and dreams about weddings, but this post I found while derping around the internet for steampunk fashion just about blew me out the window. It's a gorgeous extravaganza of steampunk/shabby/rustic/vintage/I-don't-even-know-how-to-define-it style. And they managed to pull all that off without it getting cheesy or tasteless. Have a look for yourself! 
victorian steampunk wedding from braedon flynn photography
Congrats to the new couple!

Tuesday, March 26, 2013

DIY Birdcage Veil Tutorial

If I may begin this post with a bit of boasting, I'M GOING TO ENGLAND! *fangirl squeal* That's right, the setting of pretty much every steampunk book ever, and I get to go there for a family trip this June! I shall make sure to seek out vast quantities of awesomeness to post about.
I think this would also look quite nice in black, if one is going for a more Gothic effect.
In more immediate news, prom season is coming up, and I've been gleefully searching for lovely neovictorian dresses and accessories and such, and happened across this lovely tutorial by Trash to Couture. I think it would look quite splendid with a flowing ballgown, don't you agree?

Saturday, January 19, 2013

Newsprint Nail Art Tutorial

I've always wanted to do those fancy nail polish designs, but, clumsy as I  am, I normally just ended up with giant blobs on my fingernails. And then I found this tutorial. It's easy, requires little skill and few supplies, and actually turns out looking pretty good. It's a bit more time consuming than a solid color polish, but maybe I'm just impatient.

Sunday, January 6, 2013

DIY Necklace!

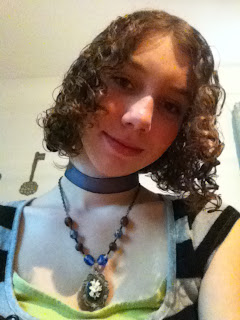
I've liked making jewelry for quite some time, but I have a confession to make: all I really do is buy pendants and put them on chains. Until now, that is.

That's right, I made this. It may be a little rough and derpy-looking, for lack of a better description, but I've got to start somewhere, and this is the first time when, in a metalworking class I'm taking, I've had the materials and knowledge to make something like this.

The eye in the center is fused glass, a process which took a great deal of cutting glass with an annoyingly dull knife and sending little shards everywhere. The pendant itself is from cut sheets of steel and copper. I cheated and used a manufactured chain and gears.

Tuesday, December 11, 2012

Tesla Con Pics are Up!

Finally, I've attained photographic evidence of my voyage to the moon! I'm afraid these pictures don't quite do justice to the experience, but I'm not sure what would... Maybe you could listen to some dramatic music while looking at these pictures. Or maybe I should actually do my job and write about it.


The Violet Ray Cure (Depicted above and below), a device from the early 20th century believed to cure just about everything. In exchange for trying it out, customers at this vendor could get a dollar off any item, so I braved the scary-looking lighting bolts coming out of the end. Sadly, it failed to cure my head cold, but I got a good deal on a button with a picture of Nikola Tesla on it. 
Some of the many sharply-dressed crew members aboard the HMS Silverstar. 
Upon our arrival to the moon, we soon discovered that we were not alone. Fortunately, the Selenites were not only peaceful, but also rather charming and Muppet-like.
A strange sort of automaton called a Dalek. From what I've heard of such things, they have a tendency to exterminate any living thing nearby, but Alexia was brave enough to snap a picture when its back was turned. 
One of the many devices displayed at the Science Fair. Artist credit and additional information is posted on the sheet of paper in front of it. 
One can never have too many jet packs, you know. 
A vampire-hunter's crossbow, complete with a silver cross and a wooden stake. I seem to have misplaced the artist credit, so if anyone knows who made this piece of awesomeness I would be quite grateful. 
 A mechanical croquet mallet. Suitable for an all-out battle with a terrible enemy, or just a simple game of croquet on a sunny afternoon. This item is entitled The Effing Mallet by Captain Magnus Effing. 

Monday, November 26, 2012

Tesla Time!


I announce with great excitement that I will be attending Tesla Con in Madison, Wisconsin next weekend. Rumor has it that an expedition to the previously unexplored surface of the moon is being planned for the event. Naturally, a curious aethernet logger such as myself simply cannot resist the call of such scientific progress.

Having sewn a dress for the event (my first made from scratch!) and gathered a notebook and pen, I am set and ready to go.

Traveling with me is a relative of mine, the scientist Alexia von Linz, who hopes that the moon may contain new species of life yet unknown to mankind. The prospect of such a discovery would be of great excitement to an aether-journalist such as myself.

Naturally, I will be posting as preparations continue, and I shall take careful notes about our extraterrestrial travels. If I fail to do so, please bombard this page with complaints.

Monday, October 1, 2012

Skirt to Top Tutorial

I've had this skirt sitting around and collecting dust for a couple years, so I finally decided to do something with it. This was pieced together in a rather improvised fashion, with numerous mistakes, so please let me know if this tutorial makes no sense.


1. I started with an ankle-length velvet pencil skirt. It wasn’t exactly ugly, but it certainly wasn’t unique or steampunk. This needed to be fixed.

2. Cut the bottom third off the skirt. Hem the rough edges on the front, but keep the back as is for now.

3. Cut two strips of fabric, each about sixteen inches long, from the cut off bottom portion of the skirt. Hem all rough edges to make straps.

4.Sew the straps onto the waistband of the skirt. Trim the straps and the front of the waistband with lace.

5. Cut two pieces of fabric, each about 2x16 inches, and sew along the edges to make two long tubes. Sew these to the side of the top to make ties.

6. Take the remaining fabric and sew it to the back of the skirt, making pleats as you go. To make pleats, pinch the fabric, fold it over, and sew down the crease. 


Monday, August 27, 2012

Easy Mini Top Hat Tutorial

 Having received a surprise invitation to a convention in less than a month, I found myself in need of something outrageous and awesome to wear, and fast. So of course I went for a mini top hat.
I ended up getting caught up in the creation process and taking fewer pictures than I should have, so please let me know if this makes no sense.

You will need: An empty cereal box
                       A disposable cup
                       A hot glue gun
                       Some fabric (I up-cycled from an old shirt)
                       A ribbon


1. Cut two circles, about 1.5 inches larger in diameter than the disposable cup. Glue the two circles together to make a sturdy base for the top hat.


2. Cut a piece of fabric around the cardboard circle. Place the cardboard in the center and fold in the fabric so it wraps around both sides of the cardboard, with the gathering point in the middle. Glue it into place.


3. Trace the open end of the cup onto the cardboard. Cut out the resulting circle and cover it with fabric using the same method as in the base.


4. Cut a large rectangular piece of fabric and wrap it around the cup so that the sides are covered. Glue the bottom of the fabric-wrapped cup to the top of the base.


5. Glue on the top portion of the hat. Tie a ribbon around the point where the base and cup meet to hide any drippings of glue, and, if desired, adorn it with feathers, pins, or whatever else you'd like.

6. Glue it to a headband, ribbon, hair clip, etc, to keep it securely in place. It also makes a nice decoration for a steampunk-themed room.


Thursday, August 23, 2012

Surprise Steampunk Fashion!

I came across these banners while waiting at the Keflavic International Airport in Iceland. I'm not quite sure what the steampunk theme has to do with the airport, but I'm not complaining, certainly.


Friday, August 10, 2012

Nautical-inspired Necklace Tutorial

This is a necklace that can be made with fairly basic materials. I think it has a Twenty Thousand Leagues Under the Sea-esque look, but different colors of beads and chain could be used to create a variety of styles.
1. Start with a length of chain long enough to fit loosely around your neck. Jewelry-making chains from craft stores tend to be easiest to work with, but other kinds will work, as well.


2. Use two pairs of pliers to pry apart the last link of chain. Hook it onto a clasp, and use the pliers to close it again. Do this for both ends.


3.Arrange the beads next to the chain, varying them by color and size.


4.Cut a length of copper wire, about 1-1.5 inches long. Use a pair of pliers to curl one end of the wire into a hook.
5. Hook the wire onto a link of chain, and continue curling it until it makes a loop.


6.Put a bead on the open end of the wire, and curl the end to hold it in place.


 5. Repeat this process until you have a bead attached every few links across the entire chain, using varying lengths of wire to create a wave-like effect.

Thursday, August 2, 2012

T-shirt to Tank Top Tutorial 2

A bit more complicated than the last one, but very cool, and I think the braid in the back is quite steampunk-looking. 


Friday, July 20, 2012

Tuesday, June 26, 2012

Ribbon Choker Tutorial


            So since I was gone all last week, I’m doing more posts than usual for a little while. Here’s a tutorial for a basic choker made from a ribbon. I like to think of this as the neo-Victorian equivalent of the punk dog collar. It’s quite versatile and looks great when layered with a pendant or longer necklace.

1. Cut a piece of ribbon about two inches longer than the circumference of your neck.
2. Fold over the end of the ribbon. 

3. Push down on the fold to make two flaps

4. Sew it down, making sure to leave the two flaps separate. Iron them flat.
5. Repeat steps two through four on the other end.
6. Place the two hook clasps between the flaps on one end and hand sew into place. Repeat on the other end with the eyes.
7. Sew on any ornamentation, beads, etc, if desired. 
Here's a finished one, layered with a cameo necklace.