It's quite brilliant, especially taking into account the low budget--this is a product of ingenuity rather than money, and, judging by the video, it's far more interesting than the majority of commercial haunted houses. My only criticism is the use of such a cliche as Jack the Ripper, who seems to appear in every Victorian horror or mystery story ever written, but I was on the edge of my seat for the entire section of that video, so I can only complain so much.
Sunday, October 28, 2012
Machine: A Steampunk Horror Show
"Machine" is a live steampunk walk-through built by two guys in a garage, which takes audiences into a time machine and on an adrenaline-filled romp through time. Sadly, the show isn't open to the public, but they did make a video for the rest of us steampunks to enjoy.
It's quite brilliant, especially taking into account the low budget--this is a product of ingenuity rather than money, and, judging by the video, it's far more interesting than the majority of commercial haunted houses. My only criticism is the use of such a cliche as Jack the Ripper, who seems to appear in every Victorian horror or mystery story ever written, but I was on the edge of my seat for the entire section of that video, so I can only complain so much.
It's quite brilliant, especially taking into account the low budget--this is a product of ingenuity rather than money, and, judging by the video, it's far more interesting than the majority of commercial haunted houses. My only criticism is the use of such a cliche as Jack the Ripper, who seems to appear in every Victorian horror or mystery story ever written, but I was on the edge of my seat for the entire section of that video, so I can only complain so much.
Tuesday, October 23, 2012
Book Review: The Steampunk Gazette
A short while ago, I was wandering a local bookstore in search of some manga and having no luck whatsoever. I was about to give up and go elsewhere when I turned around to see the words "The Steampunk Gazette" just a short distance from my face, and thus, I reacted something like this:
In all seriousness, however, Major Thadeus Tinker's The Steampunk Gazette was quite the entertaining and informative read, covering steampunk from just about every angle in little one-paragraph blurbs. Beautifully designed as a Victorian-style newspaper, this makes a nice intro for a steampunk noob or just a collection of pretty pictures for those more familiar with the scene.
On the downside, all this lovely design tends to bump up the price a little. While twenty-five dollars is a reasonable price for a fully-illustrated two hundred page book, I get the impression that it's apt to be a regular installment featuring the latest steampunk news. If so, it seems a bit fancy for a regularly printed gazette.
 |
| Ok, so maybe this whole review was just an excuse for a meme parody, but I simply couldn't resist. |
On the downside, all this lovely design tends to bump up the price a little. While twenty-five dollars is a reasonable price for a fully-illustrated two hundred page book, I get the impression that it's apt to be a regular installment featuring the latest steampunk news. If so, it seems a bit fancy for a regularly printed gazette.
Saturday, October 20, 2012
Costume Tutorial: Eyepatch/Monocle Combo
To begin with, sorry for my recent lack of posts; I've been feeling a bit lazy ill this past week.But anyway, as Halloween approached, I couldn't decide if I wanted a monocle or an eyepatch. So I decided to make both at once! I wore this to a recent Halloween party, and got lots of attention for it...But that might have been because I was the only one to show up in costume...
 1. Cut an oblong piece of fabric large enough to cover the area around your eye. I used faux leather scavenged from an ugly purse I found at Goodwill.
2. Find a round piece of slumped glass about an inch in diameter. Cut a hole in the leather that's just a little bit smaller than the glass piece.
3. Cut two more pieces of leather, each about an inch wide and long enough to go about halfway around your head.
4. Punch holes along the outer edge of the leather oval and down the center of the straps, each about a half-inch apart.
5. Take a long hemp cord and whipstitch through the punched holes around the edges of the leather. Use the cord to stitch the straps to the main part of the patch.
6. Glue a piece of fabric over the back to the patch to prevent the stitching and the ends of the straps from poking your eye. The fabric should be just slightly smaller than the main part of the patch, also with the hole in the middle.
7. Attach the glass piece over the hole. There are two ways of doing this. If the glass is wire wrapped, as mine was, you can run several pieces of thread between the wire and the hemp stitching to sew it into place. If not, a bit of hot glue will do.
8. Add a fastener to the backs of the straps. I used an elastic piece from an old laptop charger, but, lacking any of those, you could also sew on buckles, hooks, or even magnets.
9. And it's done! By the way, if you can think of any clever names for this, could you leave a comment letting me know? I can't think of any. Whoever comes up with the best one gets an imaginary cookie. :)
1. Cut an oblong piece of fabric large enough to cover the area around your eye. I used faux leather scavenged from an ugly purse I found at Goodwill.2. Find a round piece of slumped glass about an inch in diameter. Cut a hole in the leather that's just a little bit smaller than the glass piece.
3. Cut two more pieces of leather, each about an inch wide and long enough to go about halfway around your head.
4. Punch holes along the outer edge of the leather oval and down the center of the straps, each about a half-inch apart.
5. Take a long hemp cord and whipstitch through the punched holes around the edges of the leather. Use the cord to stitch the straps to the main part of the patch.
6. Glue a piece of fabric over the back to the patch to prevent the stitching and the ends of the straps from poking your eye. The fabric should be just slightly smaller than the main part of the patch, also with the hole in the middle.
7. Attach the glass piece over the hole. There are two ways of doing this. If the glass is wire wrapped, as mine was, you can run several pieces of thread between the wire and the hemp stitching to sew it into place. If not, a bit of hot glue will do.
8. Add a fastener to the backs of the straps. I used an elastic piece from an old laptop charger, but, lacking any of those, you could also sew on buckles, hooks, or even magnets.
9. And it's done! By the way, if you can think of any clever names for this, could you leave a comment letting me know? I can't think of any. Whoever comes up with the best one gets an imaginary cookie. :)
Saturday, October 13, 2012
Steampunk Haunted House
The Steampunk Haunted House is an interactive theater performance by Third Rail Productions--and it looks AWESOME! This year's theme is Then She Fell, a Lewis Carol-inspired romp through a former hospital. So it's kind of like that video game, American Mc Gee's Alice (remind me to play that and do a post on it later, it looks really cool), but in real life. I really wish I could go, but I don't think I could make it to New York and back, given the lack of vacation time in October.
Wednesday, October 10, 2012
Steampunk Town: Baraboo, Wisconsin
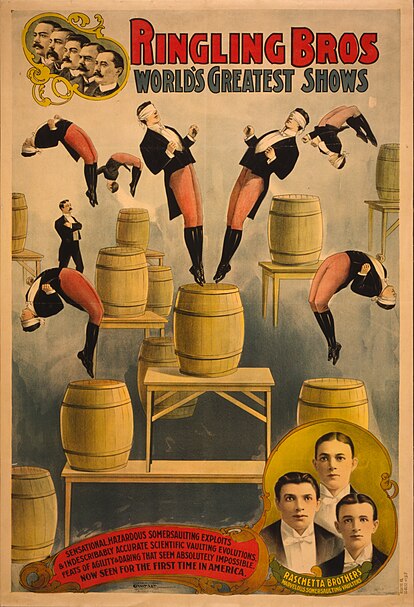 While the small population and faint scent of cow droppings may indicate otherwise, the town of Baraboo, Wisconsin contains a remarkable amount of steampunk. To begin with, it's the birthplace of that great bastion of whimsy and horror--the circus. The Ringling Brothers started out in a field just outside of town. While most local circus-related attractions are geared towards the very young and the very old, circus history is certainly something worth thinking about the next time you don a striped corset and mini top hat.
But the real steampunk is housed in Dr. Evermor's Art Park, a massive collection of scrap metal sculptures designed by artists Tom and Eleanor Every. The highlight of the park is the Forevertron, a massive futuristic sculpture made from recycled industrial machinery. I even got a chance to meet one of the artists, who are often on site. Although, at Lady Eleanor's personal request, I will not violate copyright by posting pictures here, you can find a few at the official site, and, to be honest, two dimensions really can't convey the sheer scale and detail of the artwork.
Monday, October 8, 2012
Scrollwork Ring Tutorial
 A very simple ring that I designed for a jewelry making class, inspired by the ironwork gates of Victorian manors. This takes only a few minutes and supplies that can easily be found at a craft or hardware store.
1. Cut a length of wire (approx. 12 gauge) about 2 inches long. Exact length, of course, will vary depending on the size of your finger, so you may have to do some trial and error.
2. Use a pair of pliers to bend the ends of the wire into two spirals. To do this, curl the tip of the wire into a small hook, steady it with the pliers, and curl the wire around it. The two spirals should be pointed in opposite directions.
3. Curl the ring around a ring mandrel or other ring-sized cylindrical object that you find lying around the house. Gently pounding it into place with a wooden mallet will help it form a more geometric ring shape.
Wednesday, October 3, 2012
Home Office Designs
 I really can't think of much to say about these steampunk office designs other than that they're really, really awesome. *sigh* If only I could have an office like this... But then, I'd probably never get anything done.
Monday, October 1, 2012
Skirt to Top Tutorial
I've had this skirt sitting around and collecting dust for a couple years, so I finally decided to do something with it. This was pieced together in a rather improvised fashion, with numerous mistakes, so please let me know if this tutorial makes no sense.
 1. I started with an ankle-length velvet pencil skirt. It
wasn’t exactly ugly, but it certainly wasn’t unique or steampunk. This needed
to be fixed.
1. I started with an ankle-length velvet pencil skirt. It
wasn’t exactly ugly, but it certainly wasn’t unique or steampunk. This needed
to be fixed.
1. I started with an ankle-length velvet pencil skirt. It
wasn’t exactly ugly, but it certainly wasn’t unique or steampunk. This needed
to be fixed.
2. Cut the bottom third off the skirt. Hem the rough edges
on the front, but keep the back as is for now.
3. Cut two strips of fabric, each about sixteen inches long,
from the cut off bottom portion of the skirt. Hem all rough edges to make
straps.
4.Sew the straps onto the waistband of the skirt. Trim the
straps and the front of the waistband with lace.
5. Cut two pieces of fabric, each about 2x16 inches, and sew
along the edges to make two long tubes. Sew these to the side of the top to
make ties.
6. Take the remaining fabric and sew it to the back of the
skirt, making pleats as you go. To make pleats, pinch the fabric, fold it over,
and sew down the crease.
Subscribe to:
Posts (Atom)